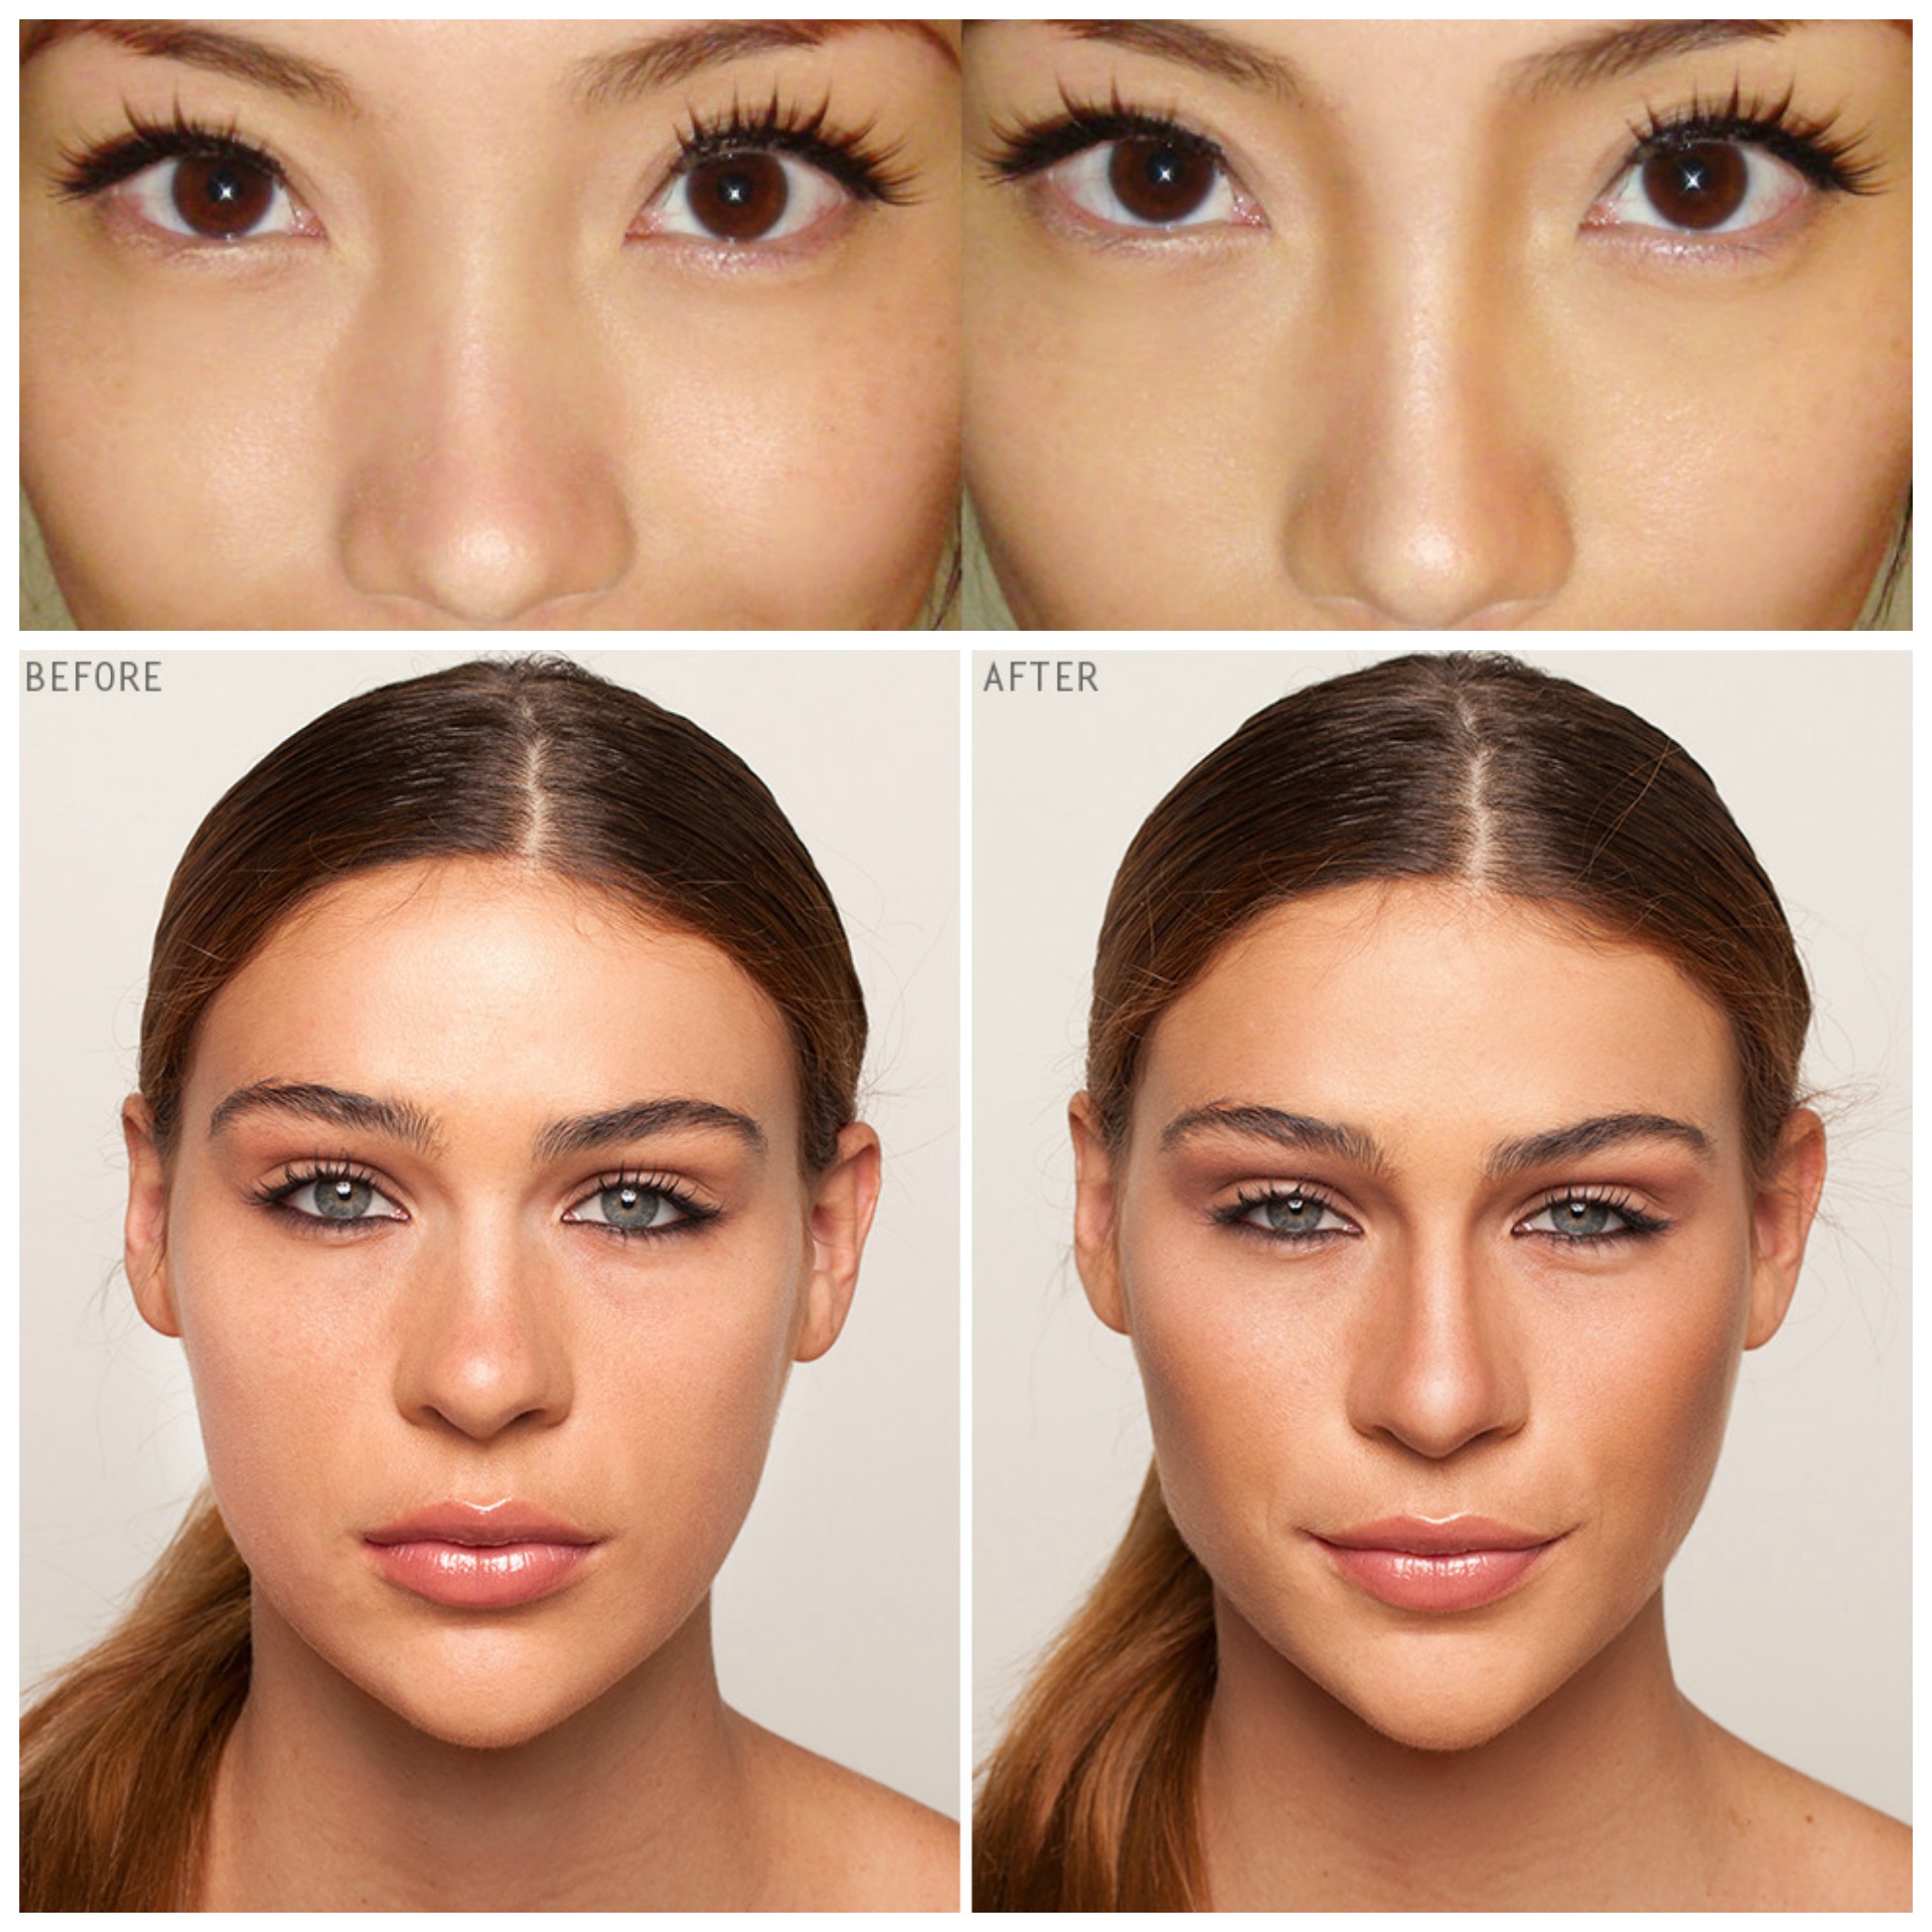
Contouring At Every Age: It’s simpler than you think!
Contouring is such a scary word to many of us. Say it and images of horrifying foundation lines, cakey makeup, and inconsistent application flashes right before our eyes. It also has felt like a trend for the super glamazons, perhaps not appropriate at every age or for the everyday look. Even though we would all love to get that perfectly sculpted look, we tend to shy away from it out of fear.
Let us put your mind at ease. Contouring is actually a fancy word for a simple concept: Darken what you don't like, lighten what you do like.

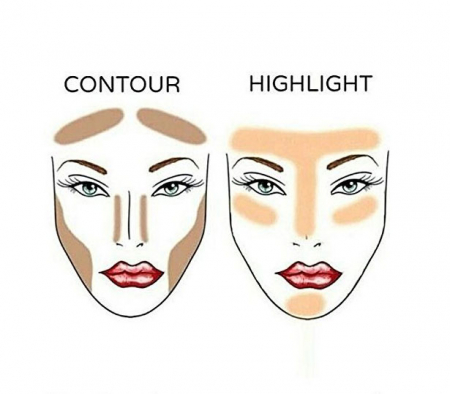
Think of it in terms of sunlight vs shade. If the sun was to shine on your face, where would you want it to hit? These are the parts of your face that you want to "bring forward" and accentuate: apples of your cheeks and your brow bone, your eyelids and the middle of your forehead, your cupid's bow and maybe slightly on the chin. Just like the light, you’ll want to lighten and highlight those areas to accentuate.
The areas that you want more in shadow or less pronounced, slightly darken them with a contour color, or a shade a few shades darker than your skin tone. Areas for contour could be the sides of your nose, the hollows of your cheek, or the crease line of your eyelid.
This diagram illustrates what we mean:

Ready to give it a shot? To start off, here’s what you’ll need in your Renzoe Box:
Palette:
- Foundation
- Highlighter
- Bronzer or Contour color
- Eyeshadow (if desired)
Lower Storage:
- Primer/Moisturizer/SPF
- Concealer
- Blending sponge (or use brushes provided with your Renzoe Box)
Before you start contouring, prep your face with your daily moisturizer, primer & SPF. We love this Paula's Choice Anti-Aging Serum Primer + SPF because of its multi-function. (Note: this primer/SPF fits into the lower compartment of your Renzoe Box using our refillable liquids bottle, free with $30+ liquid foundation purchase)
Apply your regular foundation. Next, grab your concealer and apply it under your eyes, over any wrinkles, scaring, or hyper-pigmentation you want to cover. Use in moderation! A little concealer goes a long way. You should now have smooth even finish, prepped for contouring.
Start with contour: darken the areas you’d like to hide by applying the bronzer or contour color. A quick pro tip: If you’d like to get the lifted cheek look, apply the bronzer/contour just under the cheekbones, sweeping up towards your ear. Don’t forget to blend! I can’t stress this enough!
Finally, apply your highlighter along your T-zone, tops of your cheeks, tip of your chin, and under your eyebrows to make them pop forward.
Blend blend blend, and you'll be good to go!
Congratulations! You've completed your first simple contouring. Send us pictures to let us know how it went.

Leave a comment